Powering Our Van Life: Installing Solar Panels on the Roof
If you’ve ever dreamed of traveling off-grid with your van and still having enough power for your gadgets, lights, or even a fridge, then this one’s for you. We just finished installing solar panels on our van—and it’s a total game-changer.
But let me tell you—it wasn’t all sunshine and rainbows. Let’s dive into how it went, what we used, and what we learned.
What We Installed
We went with two high-efficiency 200W solar panels, giving us a total of 400W. That should be more than enough to keep our batteries happy, even when the weather isn’t playing nice.
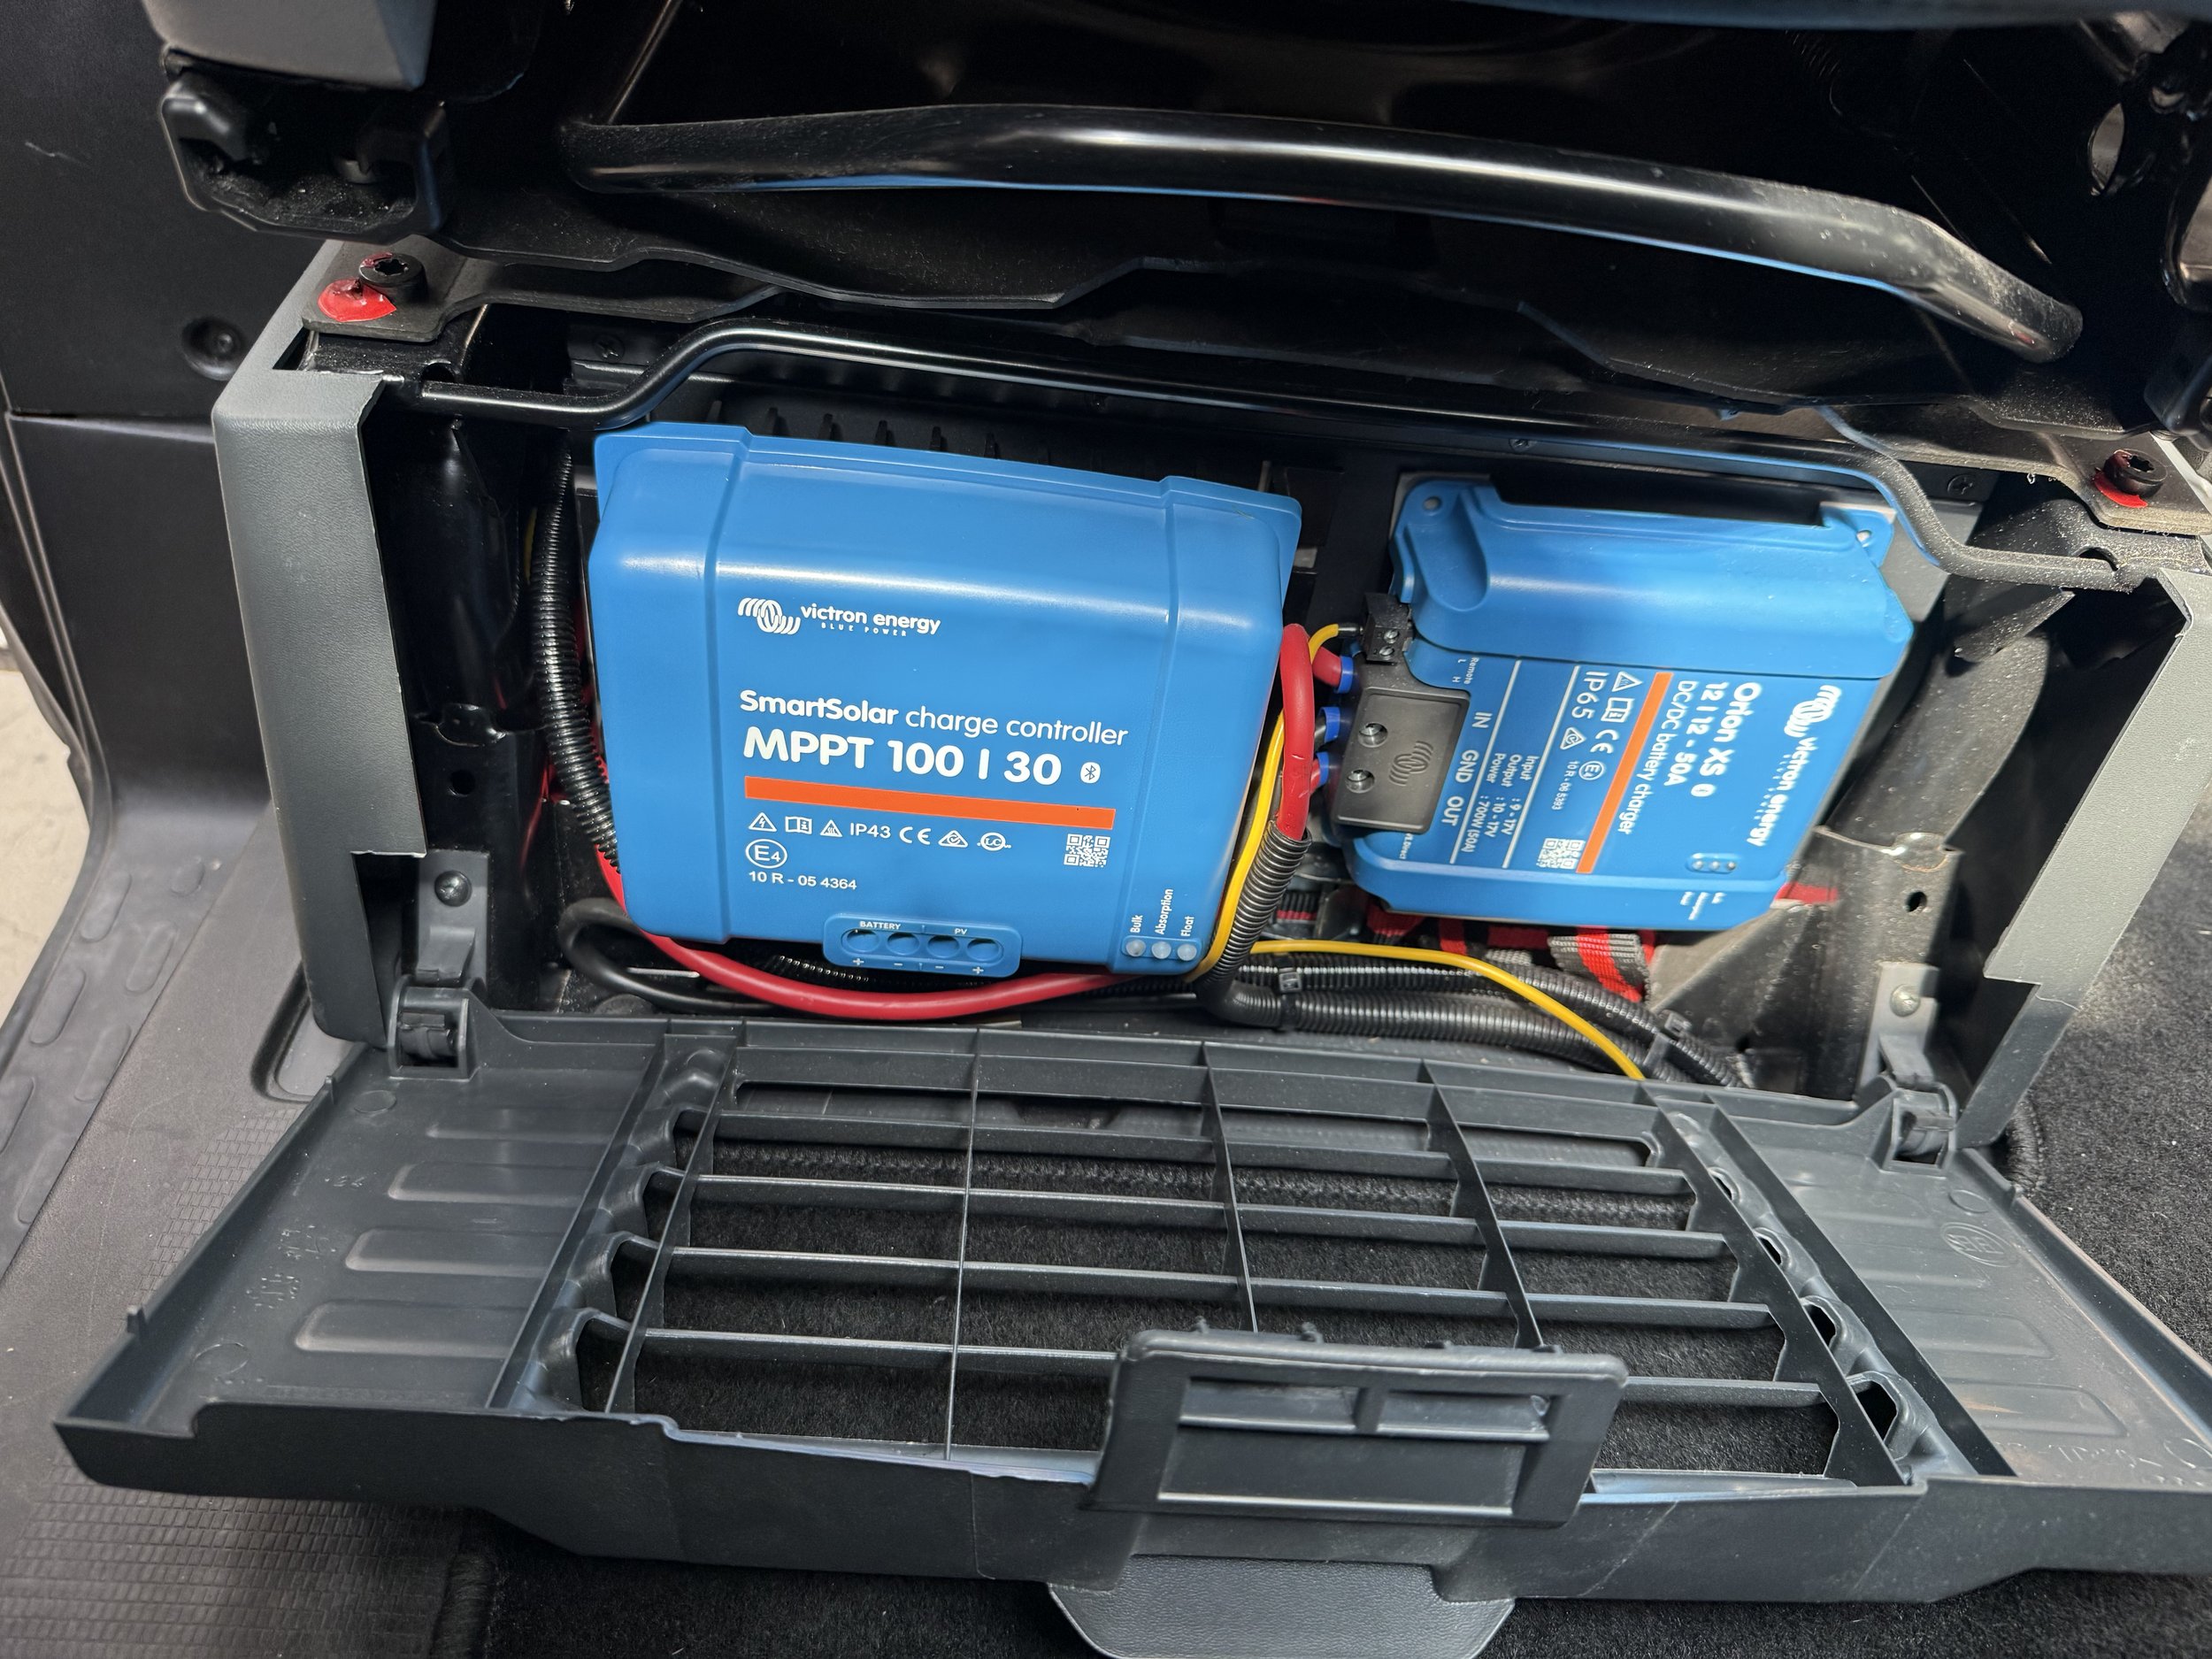
To make the most of that solar input, we paired the panels with a Victron Energy SmartSolar MPPT 100/30 charge controller. It’s a 30A model and pretty easy to work with—especially since you can monitor everything from your phone using Bluetooth.
Some of the wiring was already pre-installed, running from one of the cabinets to the battery, which saved us a good bit of time.
Now here’s the thing—we already had an external port for a mobile 340Wp solar panel. It’s been super handy for topping up the batteries when we’re parked at a campsite or out in nature. But our 540Ah lithium battery is a hungry beast, and we wanted to make sure we’re soaking up as much solar as possible. This upgrade helps us do exactly that—and even better, it means we’re charging “green” wherever we go. No need to rely on the grid or a generator when the sun can do the job.
The Roof Space Puzzle
Our van’s roof was a bit of a puzzle to figure out. We’ve got vents, roof rails, and a big 5G antenna sitting up there, all fighting for space. Finding a layout that fit both panels while still getting good sun exposure was kind of like playing vanlife Tetris.
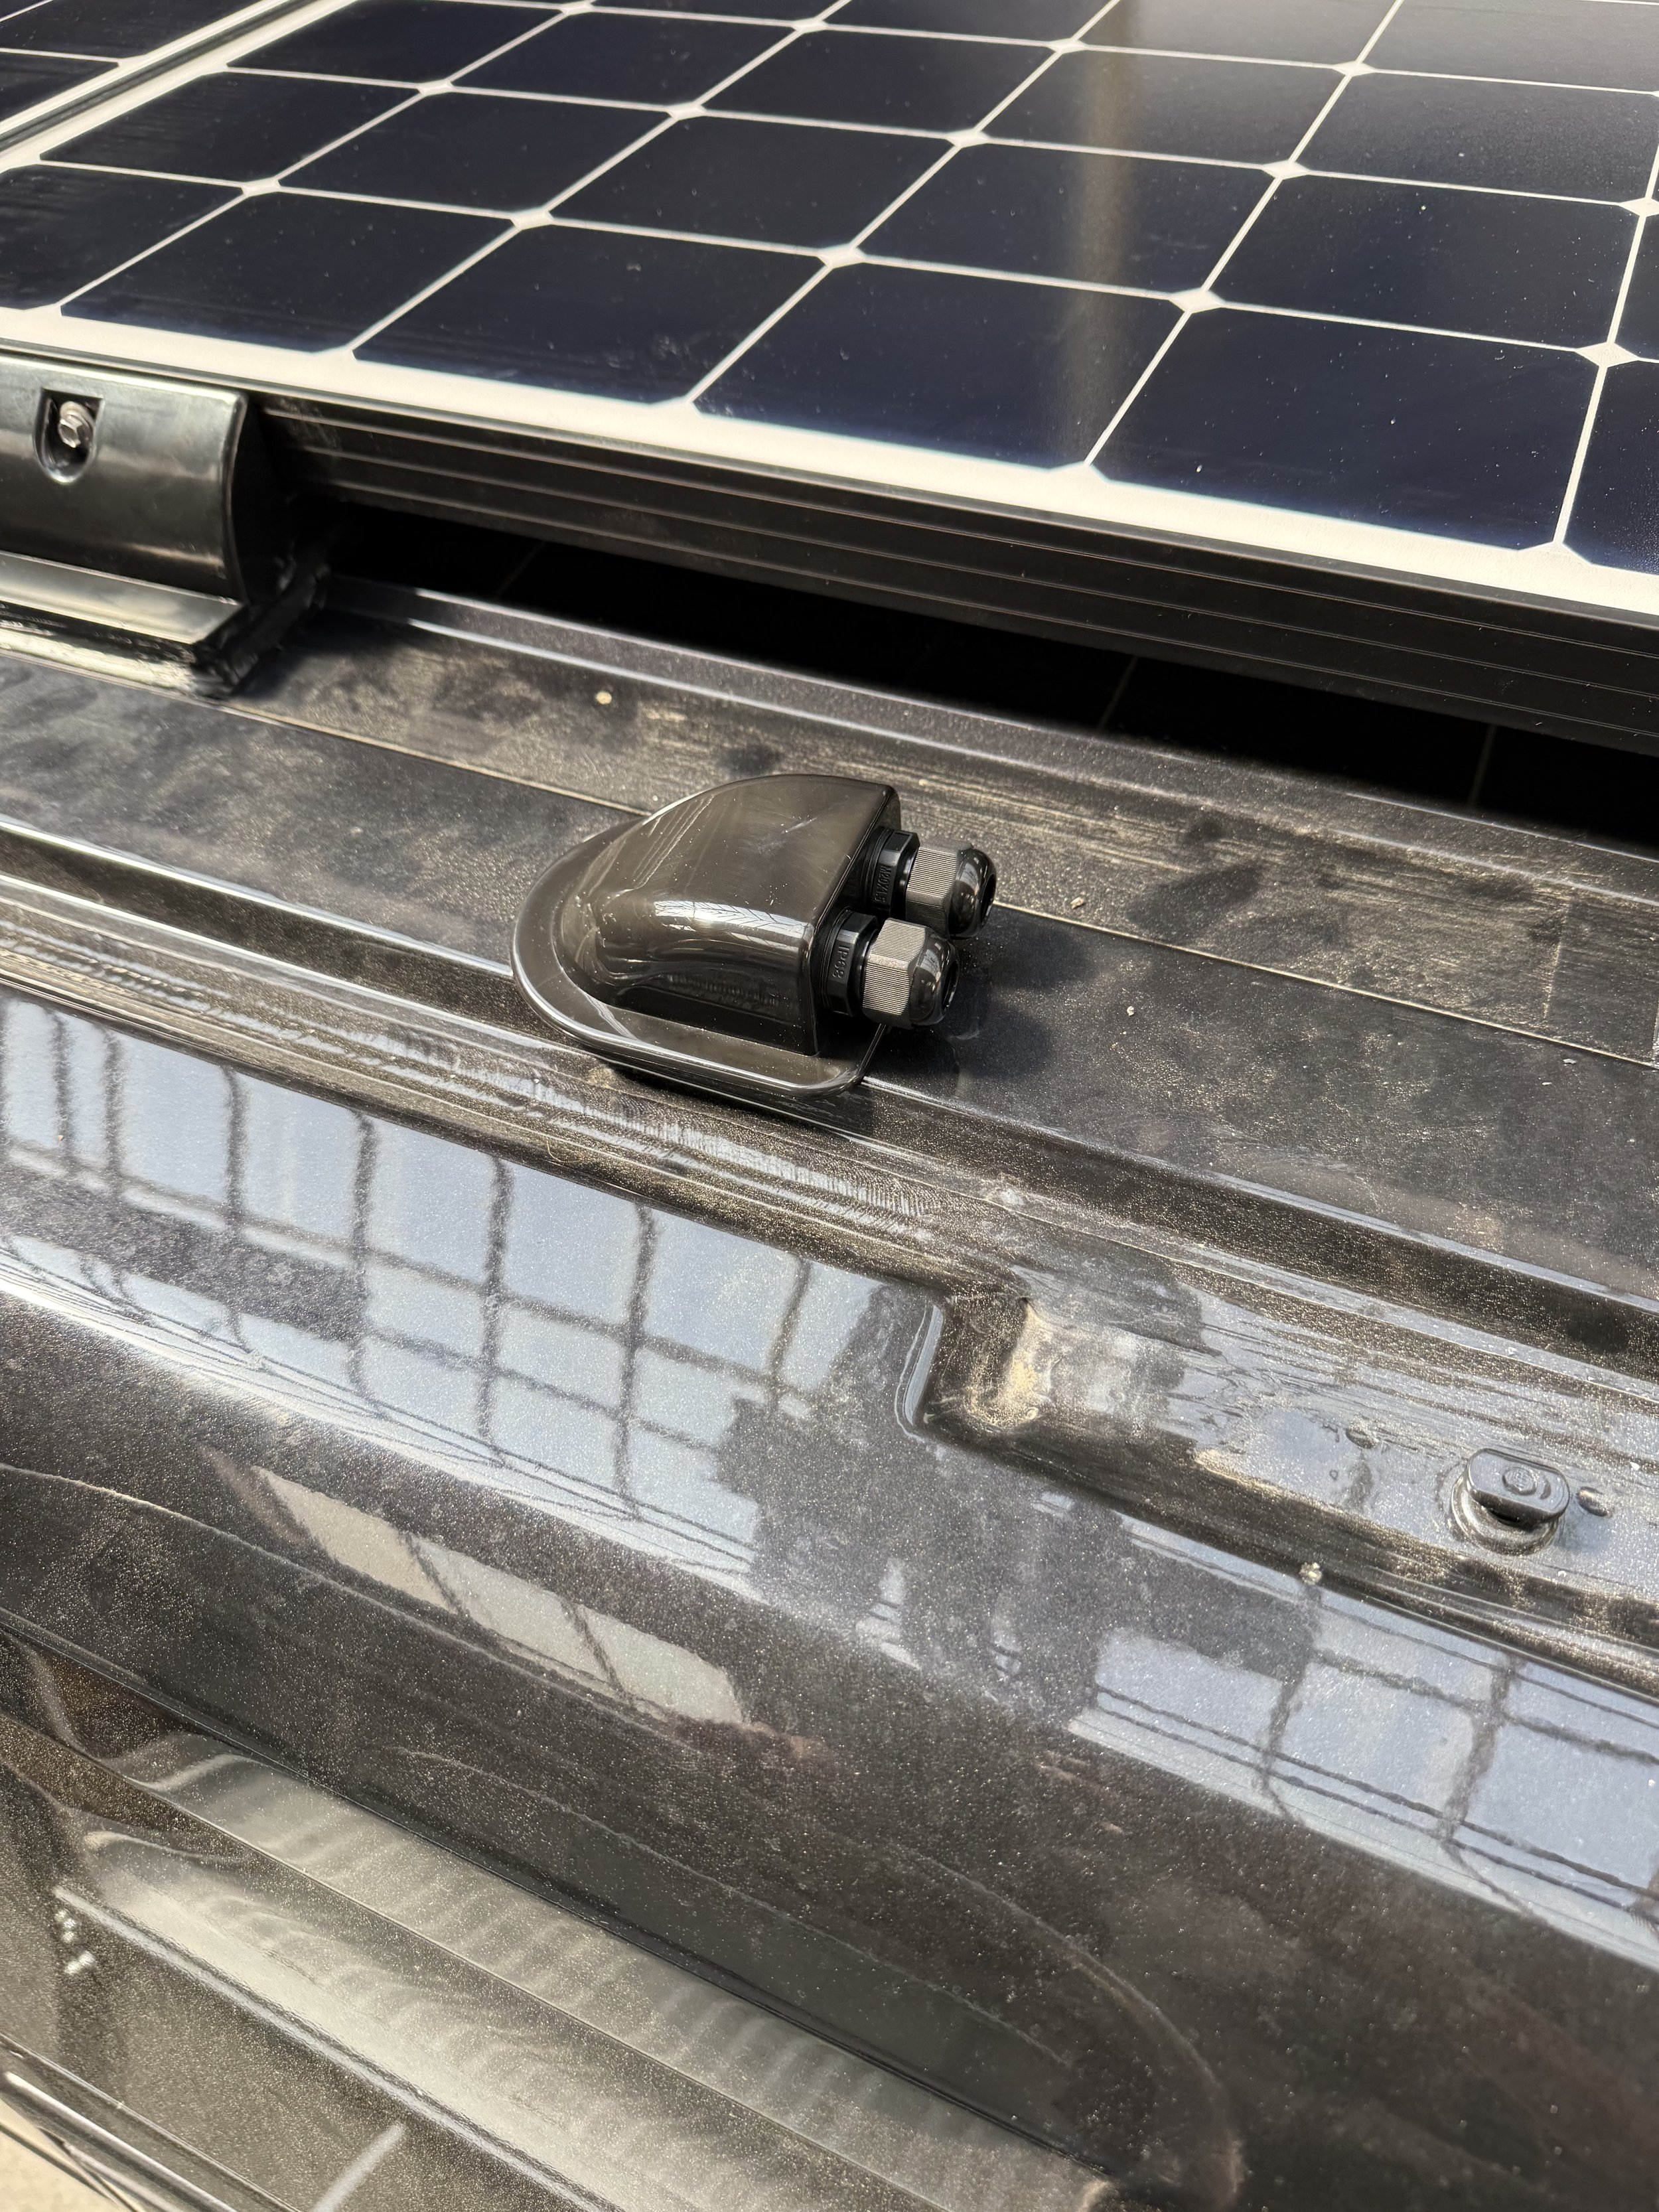
In the end, we mounted the panels parallel to each other and used a low-profile cable gland to route the cables into the van. One panel is a little closer to the roof edge than we’d usually like, but it was the only way to make it work with everything else up there.


Glue, Sweat & 5 Hours Later
Because of the antenna and some uneven surfaces, we had to go heavy on the adhesive. We used Dekalin sealant—and let’s just say we didn’t hold back. It’s not going anywhere now, even on bumpy mountain roads.
The full installation took about five hours. That included:
Measuring and planning the layout
Drilling the cable entry point
Sealing everything properly
Mounting the panels
Wiring up the charge controller
And testing to make sure it all works
It was a bit of a marathon, but totally worth it in the end.


The End Result
We now have a setup that silently charges our batteries throughout the day. Whether we’re in the mountains or parked at the beach, we don’t have to worry about running out of power—or needing to plug in somewhere.
There’s also something really satisfying about knowing that the sun is keeping everything running. Free, renewable, and clean.


Lessons Learned
Plan your roof carefully. Space runs out fast when you factor in antennas, vents, and other gear.
Use plenty of sealant. You do not want leaks in your van.
Double-check wiring. Pre-installed cables are nice, but make sure they’re the right gauge and go where you think they do.
Bluetooth monitoring is awesome. The Victron app lets you check solar input, battery voltage, and system performance right from your phone.
Would We Do It Again?
100% yes. Installing fixed solar panels on the van has made our setup way more self-sufficient. It’s one less thing to worry about when we’re off the grid, and it means we can stay in beautiful places longer without plugging in.
If you’re thinking about doing the same—go for it! And if you’ve got any questions about how we did it, feel free to reach out.
Stay sunny!